Laminate flooring installation costs $1-$5 per square foot with DIY installation taking 1-3 days for a typical room.
Use our live calculator below to get your exact laminate cost in seconds.
Step 1: Tools and Materials
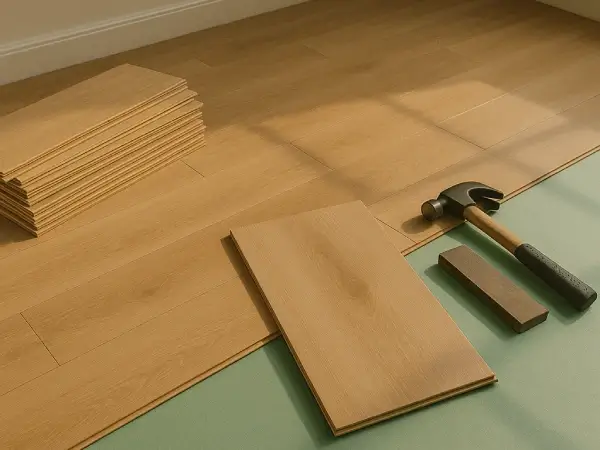
Before you begin, gather all the necessary tools and materials to ensure a smooth installation process. Here's a checklist of what you'll need:
- Laminate flooring planks and underlayment
- Tape measure, circular saw, and rubber mallet
- Pull bar, spacers, and utility knife
- Safety glasses and knee pads
Having everything ready will save you time and frustration during the installation.
Step 2: Preparation and Acclimation
Proper preparation is key to a successful laminate flooring installation. Follow these essential steps:
-
Acclimate the Flooring
Allow the laminate planks to acclimate to the room's temperature and humidity for at least 48 hours. This prevents the planks from expanding or contracting after installation.
-
Prepare the Subfloor
Ensure the subfloor is clean, dry, and level. Remove any old flooring and check for imperfections. Use a leveling compound to fill any cracks or holes.
-
Install Underlayment
Roll out the underlayment across the entire floor, overlapping seams by a few inches. This provides a moisture barrier and sound insulation.
Step 3: Installation Process
Now it's time to lay the laminate planks. Follow these step-by-step instructions for a professional finish:
-
Plan the Layout
Measure the room and plan the layout to ensure a balanced appearance. Start from the longest wall and work your way across the room.
-
Install the First Row
Place spacers against the wall and install the first row of planks, ensuring the tongue side faces the wall. Use a rubber mallet to lock the planks together.
-
Continue Installation
Continue installing planks row by row, staggering the joints by at least six inches. Use a pull bar to secure the last plank in each row.
-
Cut and Fit Around Obstacles
Measure and cut planks to fit around doorways, vents, and other obstacles. Use a circular saw or jigsaw for precise cuts.
Step 4: Maintenance Guide
Proper maintenance will keep your laminate floors looking new for years to come. Here are some essential tips:
- Sweep or vacuum regularly to remove dirt and debris
- Clean up spills immediately to prevent moisture damage
- Use a damp mop with a laminate floor cleaner for deep cleaning
- Place felt pads under furniture to prevent scratches
Step 5: Cost Analysis and ROI
Laminate flooring is a cost-effective alternative to hardwood, with an average ROI of 70-80%. Use our flooring calculator to estimate your project costs and see how much you can save by installing it yourself.
Frequently Asked Questions
Can laminate flooring be installed over existing floors?
Yes, laminate can be installed over most existing floors, as long as the subfloor is clean, dry, and level. Remove any damaged areas before installation.
How long does it take to install laminate flooring?
A 12x12 foot room typically takes 4-6 hours for a DIY installation. This can vary based on room complexity and experience.
What tools do I need to install laminate flooring?
You'll need a tape measure, circular saw, rubber mallet, pull bar, spacers, and safety equipment. Underlayment and transition strips are also essential.
Final Thoughts
Installing laminate flooring is a rewarding DIY project that can transform any room in your home. By following this guide, you'll be well-equipped to achieve a beautiful, professional-looking finish that will last for years.

Comments
Loading comments...
Leave a Comment